Introduction
Moss poles are like the secret sauce for those striving to bring their indoor gardening game to the next level. But, what exactly are these green wonders? And more importantly, why should you consider using them, or even better, how do you make one yourself? Uncovering their benefits and drawbacks, and a guide to crafting your very own.
Understanding Moss Poles
Moss poles, a staple in the world of plant care, offer an innovative solution for supporting and nurturing climbing plants. These structures, often wrapped in sphagnum moss or coco coir, mimic the natural environment of climbing plants, providing a surface for aerial roots to cling to and encouraging vertical growth. Utilizing moss poles can lead to healthier plants, enhanced leaf size, and a more vigorous growth pattern.
Pros of Moss Poles

- Promotes Natural Growth Patterns: By mimicking their natural habitat, moss poles encourage plants to exhibit more vigorous and natural growth.
- Supports Vertical Growth: They’re perfect for small spaces, allowing plants to grow upwards rather than outwards.
- Enhances Aerial Root Health: The moisture-retentive moss supports the development of strong aerial roots.
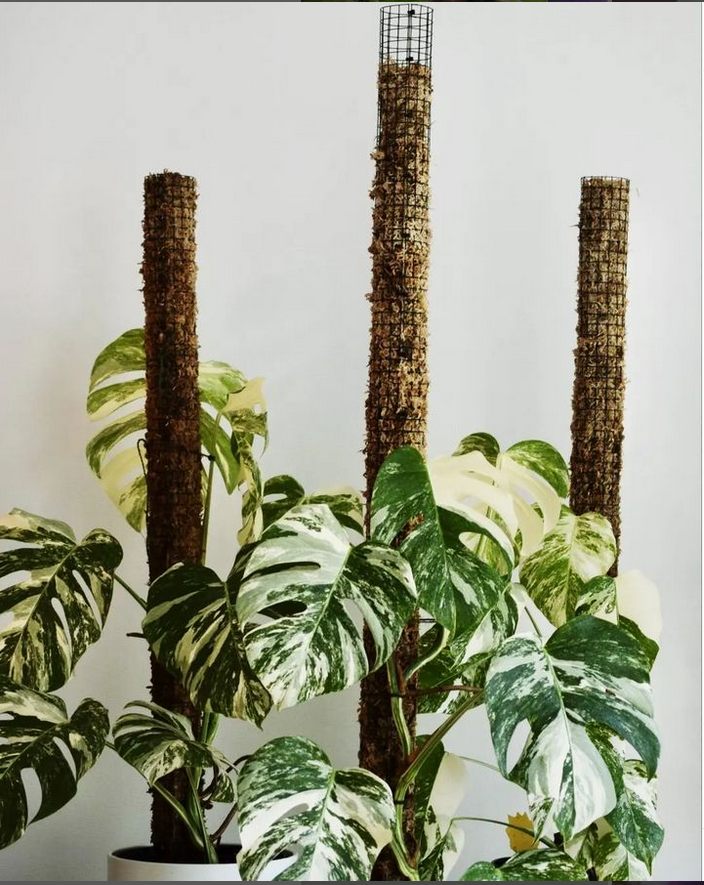
- Aesthetic Appeal: Moss poles add an eye-catching, tropical vibe to your indoor garden. Photo by: moss.pole.plants
Cons of Moss Poles
- Maintenance: They require regular misting to stay moist, which can be a bit of a commitment.
- Initial Setup Effort: Crafting or setting up a moss pole can be slightly labor-intensive.
- Potential for Moss Drying Out: If not maintained properly, the moss can dry out, which defeats its purpose.
How to Make a Moss Pole
Ready to get your hands dirty and create a moss pole? Here’s how you can DIY this plant support in a few simple steps. This project is inspired by the amazing Sydney Plant Guy, whose YouTube channel features a fantastic moss pole guide and a beautiful plant collection.
Materials Needed:

- Sphagnum moss
- Chicken wire fence ½ inch
- Substrate
- Wire cutters
- Garden tape
- Zip ties
- plastic wrap
- old plastic liter bottle/cup
- Water (for soaking the moss)
Step-by-Step Guide to Crafting Your Moss Pole:
- Soak the Sphagnum Moss: While you are making your moss pole, soak the sphagnum moss in water until fully saturated. This makes it easier to work with and helps keep your plant hydrated once the moss pole is in use.
- Cut the Chicken Wire: Using your wire cutters, cut a piece of chicken wire to the desired height. The width should be about 20 squares across this is a width that doesn’t dry out too quickly
- Fill the Chicken Wire Tube: Start laying the moist Sphagnum moss on the chicken wire leaving some room at the bottom of the pole for substrate. Make sure it’s packed tightly to provide adequate support for your plant’s roots. The tighter the moss, the better support it will offer.
- Secure the pole : Once your tube is filled, you can close the pole by securing it with zip ties,
- Add Substrate: using substrate instead of moss where the pole is buried will help prevent root rot.
- Insert into Pot: Your moss pole is now ready to be placed into the pot alongside your plant. Gently guide your plant’s aerial roots towards the moss pole.
- Attach Plant to the Moss Pole: Use additional zip ties or gardeners tape to attach your plant to the moss pole gently. This encourages the plant to start climbing the pole naturally.
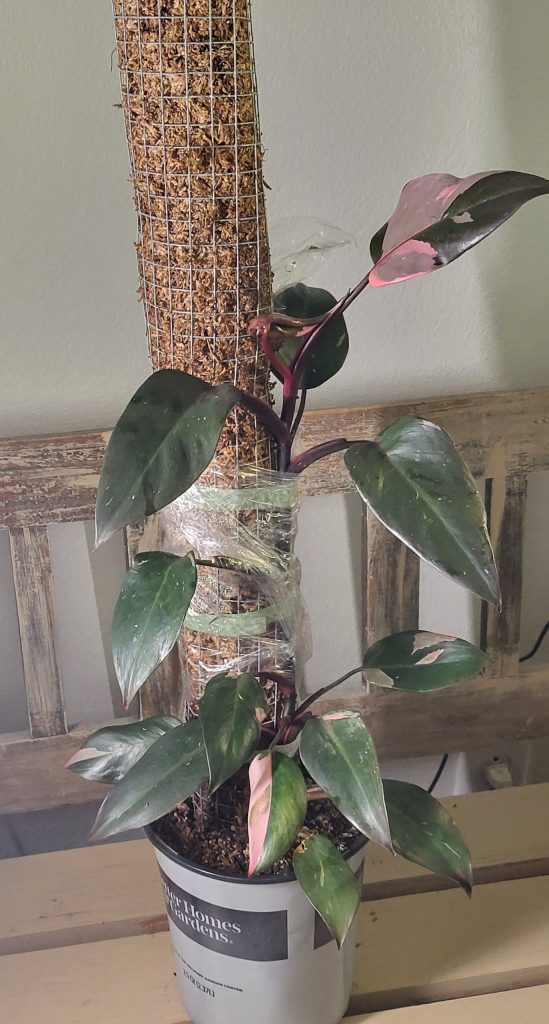
- Maintenance: To help keep poles moist use plastic wrap around the pole and water once a week with an old liter size soda bottle with holes poked through the lid.
Conclusion
Whether you’re a seasoned green thumb or just starting your indoor garden journey, a moss pole can be a fantastic addition to your plant care. Not only do they support and nurture your climbing plants, but they also add an extra layer of natural beauty
You Might Like These Articles Too:
10 More Stunning Plants That Thrive with Moss Poles


Leave a Reply